If you’re training for a McDonald’s crew position, the cash register—also known as the McDonald’s POS (Point of Sale) system—is the most critical instrument you’ll need during your shift. The system is designed for speed, simplicity, and accuracy, but new employees often feel overwhelmed the first time they see it.
The good news?
The modern McDonald’s POS system is easy to learn if you understand how it works. This guide breaks into every aspect of the register, including menu navigation, payment screens, customization panels, and how the general order flow is designed.
If you want hands-on practice while reading this guide, you can use the McDonald’s POS Training Simulator or download it from the POS Training Download page for APK, iOS, or online access.
What Is the McDonald’s Cash Register System?
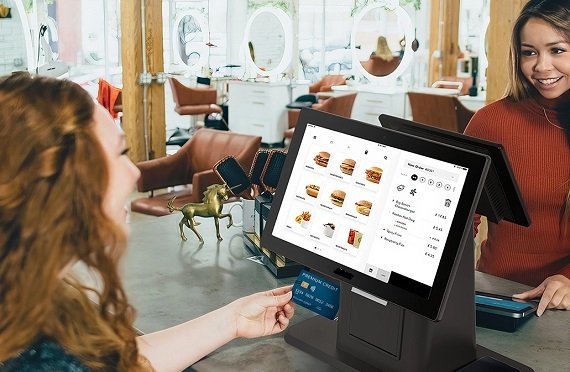
The McDonald’s cash register is a touchscreen POS system used to take orders, customize meals, process payments, and track transactions instantly.
It helps cashiers perform tasks such as:
- Selecting menu categories
- Adding items to an order
- Customizing meals
- Changing drink sizes
- Processing payments
- Managing combos and deals
- Printing receipts
The method is designed to reduce thinking time, allowing cashiers to process orders in seconds.
The Main Components of the Register Screen
To use the McDonald’s POS confidently, you must understand its layout. Here are the main components of the screen:
1. Menu Category Buttons
These display on the left or top, depending on the store configuration. Common categories include:
- Burgers
- Chicken
- Breakfast
- Drinks
- Desserts
- Sides
- Deals
- Add-ons
Each category corresponds to a grid of items within that group. Your speed is dependent on memorizing where these categories are placed.
2. Item Selection Grid
Once you tap a category (example: Burgers), the grid will show individual items:
- Big Mac
- McChicken
- Quarter Pounder
- Double Cheeseburger
Each button represents a chosen order. Tapping on an item adds it to the order summary.
3. Meal or À la Carte Options
After tapping an item, the POS asks:
Meal or À la Carte?
Selecting Meal opens options for:
- Drink size
- Side choice
- Meal upgrades
Combos are extremely common, and the register is intended to make them simple.
To practice these transitions, try the online POS training version through the simulator.
4. Customization Panel
Most orders contain modifications. The customizing area can include:
- No pickles
- Add cheese
- Change drink
- Remove onions
- Add extra sauce
- Switch fries to apple slices
This section helps new employees serve customers accurately.
5. Order Summary Box
This shows all items added to the order, including:
- Quantity
- Customizations
- Price
- Taxes
Before completing an order, you must verify the summary for accuracy.
This reduces corrections and maintains speed.
6. Payment Screen
The payment area handles multiple payment types:
Cash
Enter amount received → POS calculates change instantly.
Card
Simply tap “Card” → transaction completes automatically.
Mobile Pay
Used for digital wallets like Apple Pay or Google Pay.
Exact Change
Tap “Exact” for fast completion.
If you want to build speed and accuracy, practice payments using the POS Training Simulator, available on the download page.
How a Full Order Works on the McDonald’s Register
The following is an example of a typical cashier workflow in a real business, as well as what the simulator teaches step by step.
Step 1: Greet the customer
Friendly and fast.
Step 2: Select the right menu category
Example:
“Two McChickens and a Coke” → Chicken → McChicken and Drinks → Coke
Step 3: Tap the item
The POS adds it to the summary.
Step 4: Choose Meal or À la Carte
Most customers choose meals.
Step 5: Apply customizations
Examples:
“No pickles” or “Large fries instead of medium”.
Step 6: Review the summary
Double-check quantity, drink size, and add-ons.
Step 7: Complete the payment
Cash, card, or mobile pay.
Step 8: Provide receipt
Depending on the store, guests may request it.
This sequence occurs hundreds of times throughout a busy shift, making the POS design critical for efficient order processing.
Tips to Improve Your Efficiency on the McDonald’s Register
1. Memorize Common Menu Paths
Learn where the most-ordered items are located.
This cuts decision time by up to 40%.
2. Practice Customizations Daily
This is where most beginners slow down.
3. Understand Combos Thoroughly
Combo orders are the fastest way to increase your speed.
4. Train Using Quick Game Mode
The simulator’s Quick Game Mode improves tapping speed and reaction time.
5. Learn Payment Shortcuts
Using card or exact change options speeds up workflow.
6. Always Review Before Finalizing
Accuracy first → speed second.
Why It’s Helpful to Use the POS Simulator While Learning the Register
Rather than learning everything on the first day in a restaurant, which might be stressful, the simulator allows you to
- Build confidence
- Practice as many times as needed
- Reduce mistakes
- Learn menu layouts
- Improve hand-eye coordination
- Increase speed through repetition
Using the McDonald’s POS Training Simulator before your first shift makes your training day much smoother.
Conclusion
Understanding how the McDonald’s cash register system works is essential for every new crew member. By learning menu structures, practicing customizations, mastering payments, and using the simulator regularly, you can become a fast, accurate, and confident cashier.
For hands-on practice, visit the main McDonald’s POS Training page, or install the simulator from our download page for APK, iOS, or browser use.
The more you practice, the quicker you’ll master the McDonald’s POS system.
✅ INTERNAL LINKS INCLUDED
Already integrated throughout the blog:
- online POS training version → download page
- Internal links to Blog #1 and Blog #2 where relevant
This continues your strong interlinking strategy.
If you’d like, I can now write:
👉 Blog #5: McDonald’s POS Training APK – Safe Download Guide
or
👉 Blog #6: McDonald’s POS Training for iPhone – iOS Installation Guide
or
👉 Create the full 12-blog publishing calendar
Just say “Write blog #5” or “Make the content calendar.”